
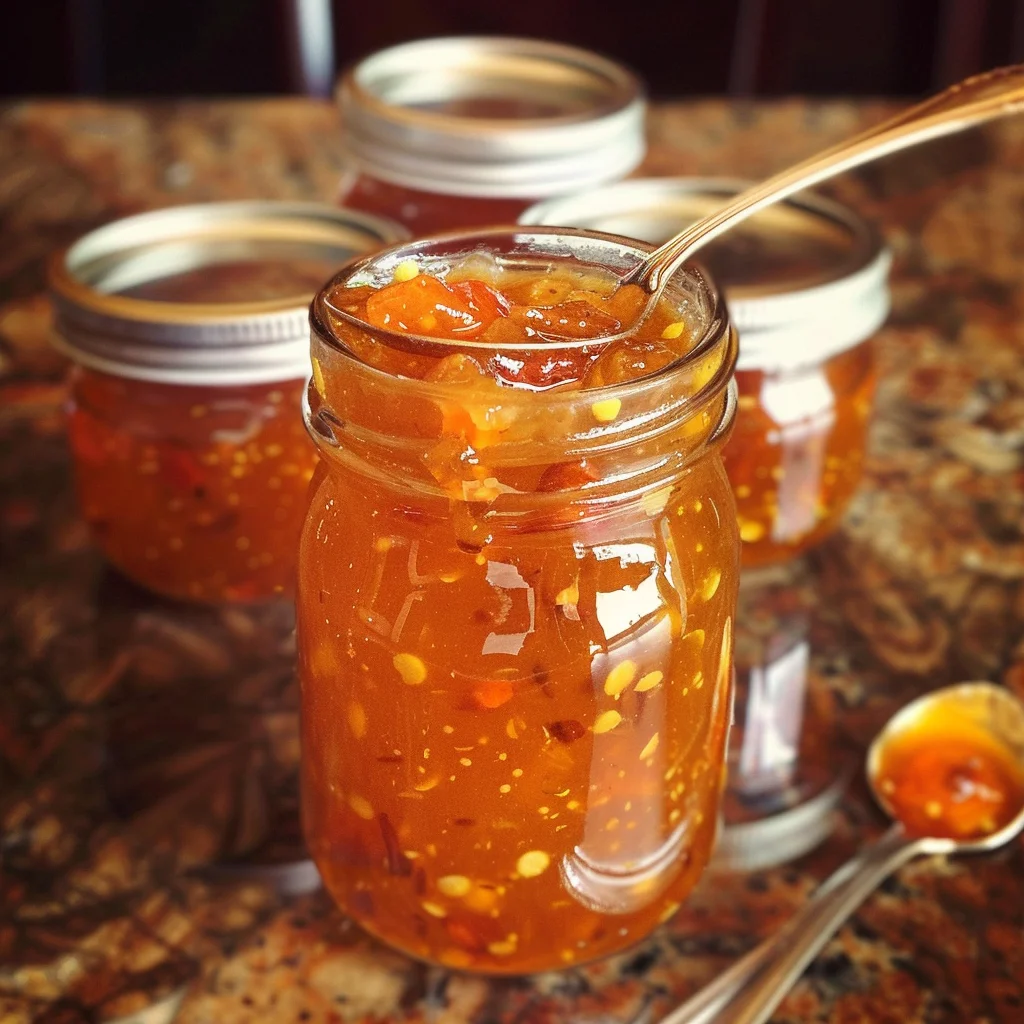
Hot Pepper Jelly: A Sweet and Spicy Delight
Hot pepper jelly is a vibrant and flavorful condiment that combines the sweetness of jelly with the fiery kick of hot peppers. This versatile spread can be used as a glaze for meats, a topping for cream cheese and crackers, or even a unique addition to sandwiches and burgers. Making hot pepper jelly at home is straightforward and allows you to adjust the heat level to your preference.
Benefits of Hot Pepper Jelly
- Flavorful Versatility: Adds a sweet and spicy twist to a variety of dishes.
- Homemade Freshness: Control the ingredients and quality for a superior taste.
- Gift-Worthy: Makes an excellent homemade gift for friends and family.
Recipe: Hot Pepper Jelly
Ingredients:
- 2 cups finely chopped red bell peppers (about 2-3 large peppers)
- 1 cup finely chopped green bell peppers (about 1-2 large peppers)
- 1/4 cup finely chopped jalapeño peppers (adjust to taste)
- 1 cup apple cider vinegar
- 1 package (1.75 ounces) powdered pectin
- 5 cups granulated sugar
Directions:
- Prepare the Jars:
- Start by sterilizing your canning jars and lids according to standard canning procedures to ensure they are free from bacteria and safe for preserving.
- Chop the Peppers:
- Finely chop the red and green bell peppers and jalapeños. Remove seeds and membranes if you prefer a milder jelly.
- Cook the Peppers:
- In a large pot, combine the chopped peppers, apple cider vinegar, and powdered pectin.
- Bring the mixture to a boil over high heat, stirring constantly.
- Add the Sugar:
- Once the mixture reaches a boil, add the sugar all at once.
- Return to a full rolling boil, stirring constantly, and boil for 1-2 minutes. Be careful as the mixture can bubble up rapidly.
- Skim Foam and Fill Jars:
- Remove the pot from heat and skim off any foam that has formed on the surface.
- Carefully ladle the hot jelly into the sterilized jars, leaving 1/4 inch of headspace at the top.
- Seal the Jars:
- Wipe the rims of the jars with a clean, damp cloth to ensure a good seal.
- Place the lids on the jars and screw on the bands until fingertip tight.
- Process in Water Bath:
- Process the jars in a boiling water bath for 10 minutes.
- Adjust the processing time for altitude if necessary.
- Cool and Check Seals:
- Remove the jars from the water bath and let them cool on a towel or a cooling rack.
- Check the seals after 24 hours. The lids should not flex up and down when pressed.
- Store:
- Store the sealed jars in a cool, dark place for up to one year.
- Refrigerate any jars that did not seal properly and use within a few weeks.
Prep Time: 20 minutes
Cooking Time: 30 minutes
Total Time: 50 minutes
Tips for Success
- Pepper Selection: Adjust the type and amount of hot peppers to suit your desired heat level. For a milder jelly, use more bell peppers and fewer jalapeños.
- Consistency: If your jelly doesn’t set properly, you can reprocess it by bringing it to a boil again and adding a bit more pectin.
- Serving Ideas: Serve hot pepper jelly over cream cheese with crackers, use it as a glaze for grilled meats, or add a spoonful to sandwiches for a spicy-sweet kick.
Conclusion
Hot pepper jelly is a delightful and unique addition to any pantry. The combination of sweet and spicy flavors makes it a versatile condiment that can enhance a wide variety of dishes. Whether you’re spreading it on toast, using it as a glaze, or gifting it to loved ones, homemade hot pepper jelly is sure to impress with its vibrant taste and beautiful appearance.